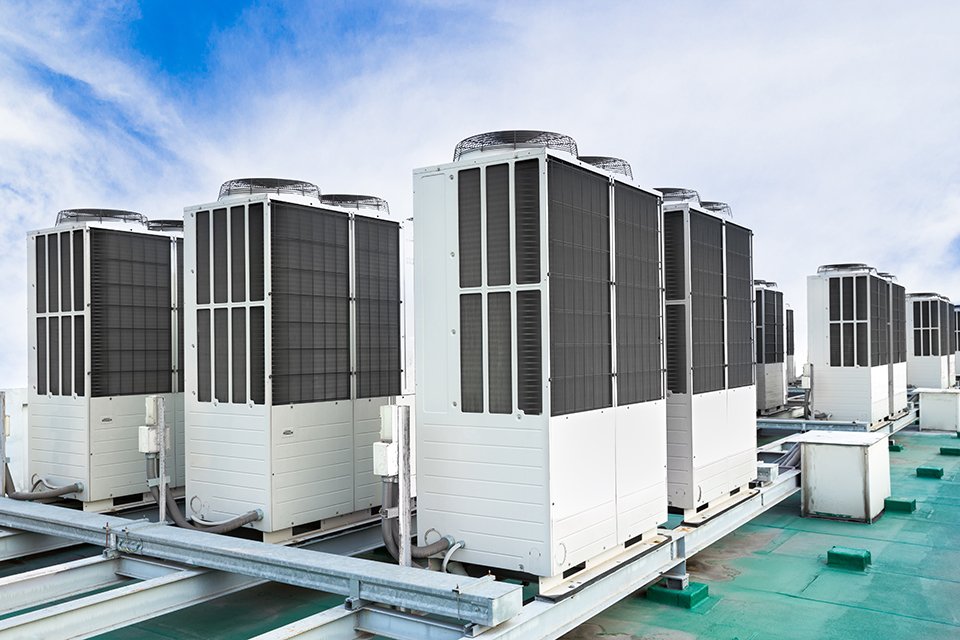
Installing a new rooftop unit (RTU) with a secure curb is an essential project for improving HVAC capabilities in commercial and industrial buildings. This guide provides a step-by-step approach, starting from the initial preparation and roof curb installation to the final RTU setup. This will help you achieve a professional-grade installation while enhancing building comfort and energy efficiency. While we provide all the information about the process, it’s still necessary to hire a professional roofing expert to fix roof leaks for any complex project.
Part 1: Installing the Roof Curb
The roof curb acts as the structural foundation that supports the rooftop unit and aligns it securely with the building’s ventilation and electrical systems. A sturdy curb is crucial for safety and longevity.
Materials Needed
- Pre-fabricated Roof Curb: Usually designed to match the specific RTU model, these curbs provide structural stability and align perfectly with the unit’s connections.
- Sealant: Choose a durable, weather-resistant adhesive to seal the edges.
- Roofing Screws or Fasteners: These should be corrosion-resistant to withstand various weather conditions.
- Insulation Material: To enhance energy efficiency and prevent condensation around the curb.
- Roofing Materials for Flashing: These will help waterproof the curb and prevent leaks.
Steps
- Determine Placement and Prepare the Roof
- Consider Load and Structural Integrity: Choose a location that can handle the weight of the RTU. This typically involves consulting a structural engineer.
- Measure and Mark the Area: Ensure accuracy when marking the roof to avoid misalignments. The curb placement should allow for adequate airflow and should not obstruct any existing roof features, such as vents or skylights.
- Cut the Roof Opening
- Cut Carefully: Precision is essential, as a miscut can compromise the seal and cause leaks. Use specialized tools, such as a reciprocating saw, and follow the curb dimensions exactly.
- Safety Precautions: Ensure all workers are wearing safety equipment, and be mindful of surrounding structures and wiring beneath the roof.
- Position the Curb
- Check Alignment and Level: Use a spirit level to ensure the curb is level, as any imbalance can affect the RTU’s performance.
- Adjust as Needed: Small adjustments using shims or leveling brackets can ensure the curb sits evenly, providing a stable platform for the RTU.
- Secure the Curb to the Roof
- Anchoring the Curb: Use roofing fasteners to attach the curb securely to the roof deck, creating a solid base for the heavy RTU.
- Check for Loose Ends: Make sure all fasteners are tightly screwed in to prevent movement, which could lead to future structural issues.
- Weatherproof the Curb
- Apply Sealant Generously: Waterproofing is essential to prevent leaks and water damage. Apply a high-quality sealant or roofing adhesive to all edges and seams.
- Install Flashing: Flashing diverts water away from the curb edges, preventing moisture buildup that could cause rust or structural weakening.
- Add Insulation if Needed: Insulating around the curb helps improve energy efficiency and can prevent condensation in colder climates.
- Inspect the Curb
- Conduct a Final Check: Ensure all edges are sealed, fasteners are tight, and the curb is level. This is critical to avoid rework once the RTU is installed on top.
Part 2: Installing the New Rooftop Unit (RTU)
With the curb securely in place, you’re ready to install the RTU. This step requires precision and attention to safety, as RTUs are heavy and require proper handling.
Equipment Needed
- Crane or Lifting Equipment: A crane is usually necessary to lift the RTU onto the roof.
- Leveling Tools: To confirm the RTU sits evenly on the curb.
- Electrical and HVAC Tools: For wiring, ductwork, and connection of utilities.
- Bolts, Washers, and Nuts: These will secure the RTU to the curb.
Steps
- Prepare the RTU for Installation
- Inspect the Unit: Make sure all components are included and undamaged. Confirm that you have the correct model for your curb size.
- Pre-Assemble Connections if Needed: Some RTUs come partially assembled, but others may require basic assembly of fittings or duct adapters before hoisting.
- Position the RTU on the Roof Curb
- Use a Crane to Lift the Unit: Safely guide the RTU into place on top of the curb. Ensure that all workers maintain a safe distance and use appropriate protective equipment.
- Align the Base: The RTU should sit flush on all curb edges, with no gaps or overhangs that could cause instability or leaks.
- Secure the RTU to the Curb
- Bolt Down the Unit: Use bolts, washers, and nuts to secure the RTU firmly to the curb, ensuring it can withstand weather and wind pressures.
- Double-Check Fastening: A secure attachment prevents movement, which could damage connections or misalign the RTU over time.
- Connect Electrical and Gas Lines
- Turn Off Power and Gas: Before making any connections, turn off all utilities to prevent accidents.
- Connect Wiring: Follow the manufacturer’s instructions for electrical connections, ensuring all wires are properly secured and grounded.
- Attach Gas Lines (if applicable): Use the correct fittings and check for potential leaks once connected.
- Test for Leaks and Functionality
- Check Gas Lines for Leaks: A leak test on gas lines is crucial to prevent dangerous leaks.
- Ensure Electrical Connections are Secure: Verify all wiring connections to prevent short circuits or electrical failures.
- Power On and Test the System
- Run a Startup Test: Turn on the power, run the RTU through a full startup, and ensure it operates smoothly. Check heating, cooling, and airflow.
- Monitor for Abnormal Noises or Issues: Listen for any unusual sounds and adjust the system settings if necessary.
- Check Efficiency Settings: Some RTUs have programmable settings for enhanced efficiency. Calibrate these settings according to building needs.
Final Checklist
- Double-Check Fastenings: Confirm all bolts and fasteners are tightened securely.
- Verify Seals: Re-check all sealants and flashing to ensure they are watertight.
- Inspect Electrical and HVAC Connections: Verify the wiring and ductwork connections are tight and secure.
- Run Operational Tests: Ensure optimal performance by running a complete functionality check.
Tips for a Successful Installation
- Work with a Qualified Team: Since the installation process involves both structural and mechanical work, hiring experienced professionals can ensure a smoother process.
- Prepare for Weather: Schedule the installation on a day with clear weather to avoid moisture issues and other hazards during the setup.
- Inspect Regularly Post-Installation: After installing the RTU, periodic inspections help to catch minor issues before they develop into significant problems.
By following these steps carefully, you can complete a professional RTU and curb installation that provides efficient, reliable HVAC performance for years to come. Proper planning, precision, and safety protocols are key to a successful project.


