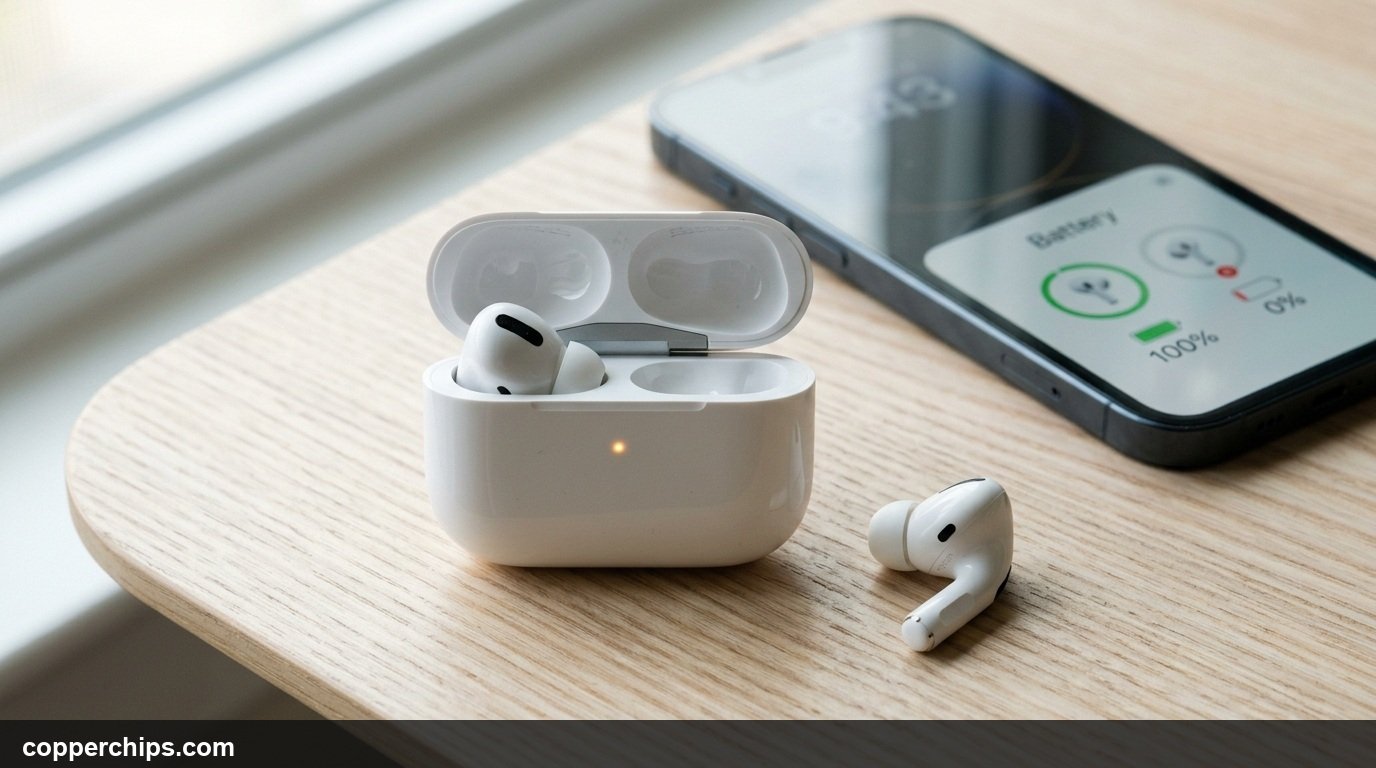
You pop your AirPods into your ears, hear the connection chime in only one ear, and discover the other earbud is completely dead. When asking why is only one airpod charging while the other remains at 100 percent, the culprit is almost always physical debris or desynchronized battery management firmware. True wireless earbuds rely on low-voltage spring-loaded pin contacts that require direct, uninterrupted electrical contact to initiate power transfer.
A microscopic layer of pocket lint, body oils on the stem contact ring, or a jammed spring pin can stop current from flowing into the depleted earbud. Following this systematic hardware and software cleaning protocol will get both AirPods charging evenly again.
Clean the silver contact ring on the earbud stem and the gold spring pins inside the case slot using a dry cotton swab. Pocket lint compacted at the bottom of the slot physically lifts the earbud away from the charging pins. If the contacts are clean, perform an AirPods hard reset: place both buds in the case, open the lid, and hold the back setup button for 15 seconds until the status light flashes amber, then white. Re-pair with your iPhone.
- vPocket Lint Blockage: Debris collected at the base of the charging well is the primary cause of single-bud failure.
- vSpring Pin Jamming: Inside the case, one of the two gold contact pins may be compressed and stuck downward.
- vAmber Light Reset: Holding the case button for 15 seconds clears corrupted power management firmware registers.
Why Does One AirPod Stop Charging in the Case?
Each AirPod operates as an independent battery-powered computer with its own power management integrated circuit (PMIC). The bottom tip of each stem contains silver contact rings that meet two miniature spring-loaded gold pogo pins at the base of the charging well.
Because the charging current operates at low voltage, even a microscopic layer of lint or earwax creates enough electrical resistance to prevent current transfer. When resistance is too high, the case logic board detects a fault and cuts power to that specific slot to prevent short circuits.
Firmware desynchronization also occurs occasionally. If one earbud discharged to absolute zero percent while the other remained charged, the dead earbud battery controller may enter a deep sleep protection state that requires a prolonged charging session to wake.
How to Fix Only One AirPod Charging: 7 Solutions
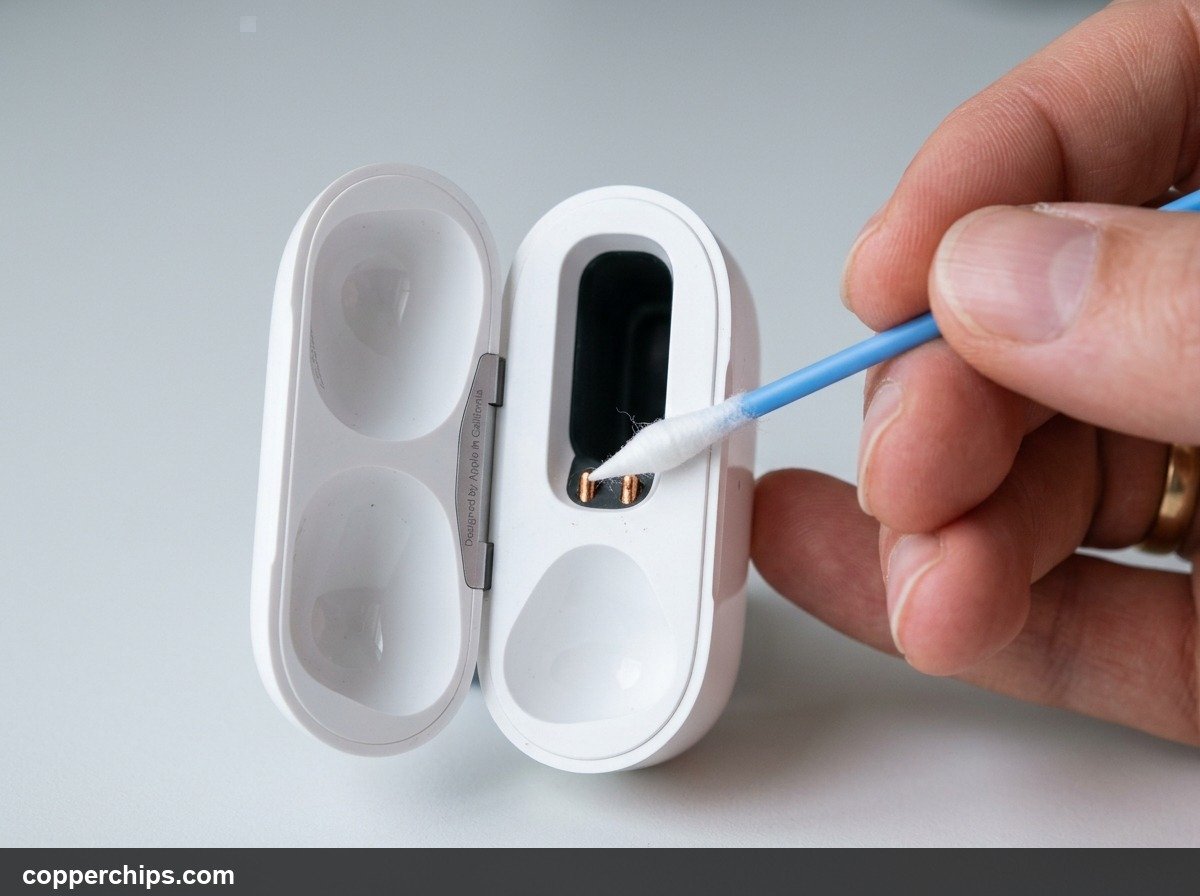
Fix 1: Clean the Stem Contact Rings and Charging Well
Remove compacted pocket lint and body oils from the electrical contact surfaces. This single physical fix restores charging capability in over eighty percent of reported cases.
- Take a clean, dry cotton swab (Q-tip) and gently insert it into the bottom of the affected charging slot.
- Twist the swab gently with light pressure to lift out compacted pocket lint and dust bunnies.
- Inspect the bottom tip of the dead AirPod stem and wipe the silver contact rings clean with a microfiber cloth.
- If waxy residue persists, lightly dampen the cotton swab with 70% or 90% isopropyl alcohol (never dripping wet, following Apple official guidelines on cleaning AirPods and charging cases) and clean the contacts.
- Allow the cavity to air dry completely for two minutes before reinserting the earbud.
Fix 2: Inspect the Internal Gold Spring Pins for Sticking
Verify that the spring-loaded pins inside the case cavity have not collapsed. Inside each charging slot, two tiny gold-plated pogo pins provide electrical continuity when compressed.
- Shine a smartphone flashlight directly down into both charging slots.
- Compare the height of the two gold pins in the working slot against the pins in the failed slot.
- If one pin in the dead slot appears stuck down flush with the plastic floor, it cannot make contact with the earbud stem.
- Gently nudge the stuck pin with a dry wooden toothpick using minimal pressure to free the spring mechanism.
Once released, the pin should spring back up to match the height of its partner pin.
Fix 3: Perform the 15-Second Case Setup Button Reset
Restore AirPods battery management firmware to factory status. Corrupted battery monitoring states often trick your iPhone into reporting zero percent battery even when charging current is flowing.
- Place both AirPods inside the charging case and close the lid for 30 seconds.
- Open the lid of the charging case with both AirPods remaining inside.
- On your iPhone, go to Settings > Bluetooth, tap the (i) icon next to your AirPods, and tap Forget This Device.
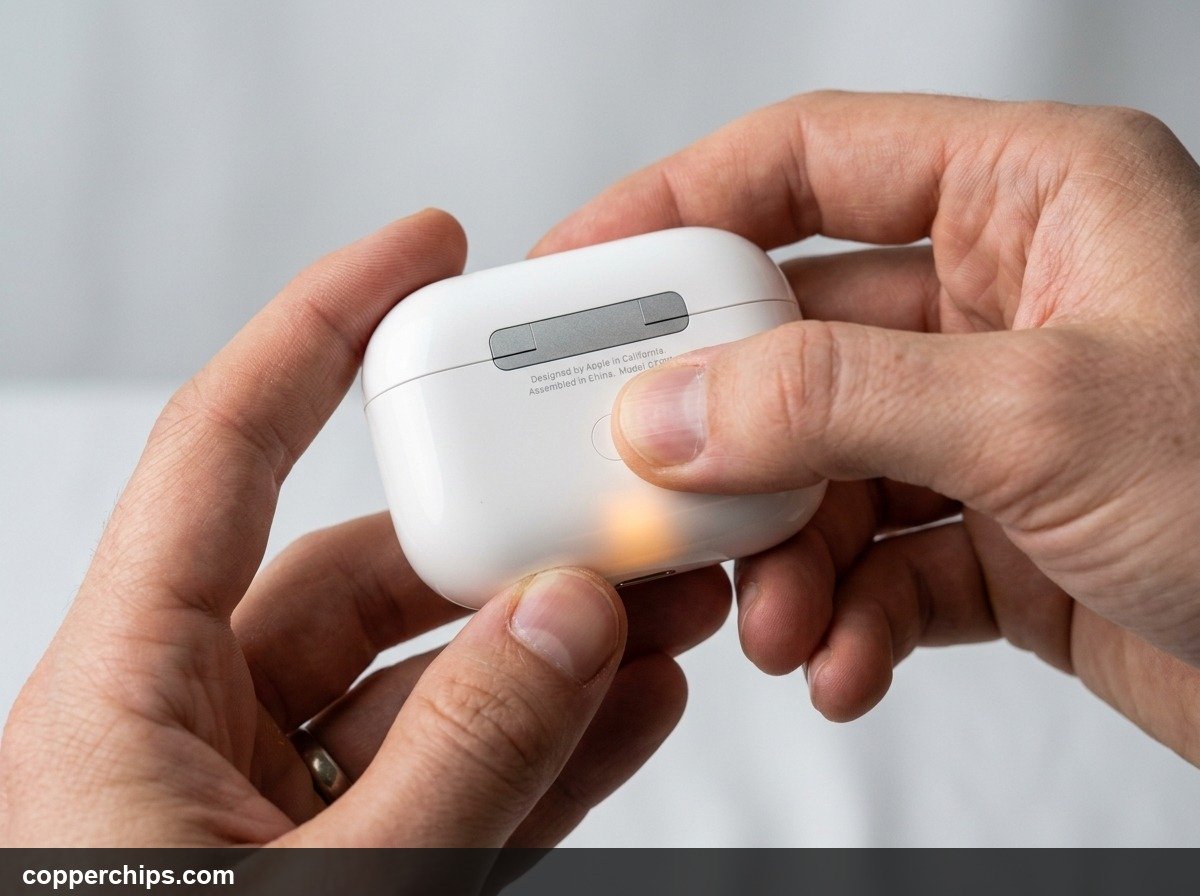
- Locate the flush circular setup button on the back of the AirPods case.
- Press and hold the setup button continuously for 15 seconds (detailed in Apple official instructions to reset AirPods and AirPods Pro).
- Watch the status light on the case front (or inside the lid on 1st gen models) flash amber several times, then begin flashing white.
- Hold the open case next to your unlocked iPhone and follow the on-screen setup animation to re-pair.
This hard reboot resets the internal microcontroller and clears false battery sensor readings.
Fix 4: Check Case Battery Reserve (The 10% Floor)
Ensure your charging case possesses sufficient reserve power to charge both buds. When an AirPods case drops below ten percent battery, it lacks the voltage required to run both charging circuits simultaneously.
- Place both AirPods inside the case and plug the case into a wall charger using a verified Lightning or USB-C cable.
- Leave the case plugged into wall power for at least 30 to 45 minutes without opening the lid.
- Check the battery widget on your iPhone to verify that the case displays a green charging lightning bolt.
Supplying steady wall power ensures the case power supply does not shut down when the dead earbud draws high initial charging current.
Fix 5: Test the Wiggle and LED Flash Confirmation
Use the charging case status light as an electrical continuity tester. Every time an AirPod connects properly to the internal pins, the case LED provides a distinct visual signal.
- Remove both AirPods from the charging case.
- Insert only the working AirPod. Observe the case status LED: it will flash amber or green once as the bud connects.
- Remove the working bud, and now insert only the problematic AirPod.
- Watch the LED carefully. If the light does not flicker or flash when the bud seats, the pins are not making physical contact.
- Gently press down and wiggle the earbud in the slot. If the light flashes when pressed, the fit is loose due to debris.
Fix 6: Remove Thick Third-Party Silicone Ear Tips (AirPods Pro)
Ensure aftermarket accessories are not obstructing physical case closure. Large replacement memory foam or silicone ear tips can prevent AirPods Pro from dropping all the way to the bottom of the slot.
- Pull the silicone ear tip off the non-charging AirPod Pro.
- Insert the bare earbud into the charging case without the tip.
- Close the lid and check if the earbud begins charging on your iPhone battery screen.
- If charging starts immediately, the aftermarket tip was preventing magnetic closure.
Fix 7: Rebalance Mono Audio and Accessibility Settings
Confirm that sound output settings have not been panned entirely to one ear. Sometimes an AirPod is fully charged, but an accidental accessibility adjustment mutes audio output in that ear.
- On your iPhone, open Settings > Accessibility > Audio & Visual.
- Scroll down to the Balance slider.
- Ensure the slider is centered directly at 0.00 between left and right channels.
- Toggle off Mono Audio if it was enabled.
Still Not Working? Try This
If you have thoroughly cleaned the contacts and performed the 15-second amber light reset, but one AirPod remains completely dead, you may be dealing with lithium-ion battery exhaustion. Miniature earbud batteries typically survive 400 to 500 charge cycles before suffering capacity collapse.
Test the dead earbud in a friend or family member AirPods case of the same generation. If the earbud charges in their case, your charging case has a blown internal charging circuit. If the earbud refuses to charge in any case, the earbud internal battery cell has failed permanently.
Apple sells individual replacement left or right AirPods through Apple official support for AirPods charging issues, saving you the expense of purchasing a completely new pair.
[AFFILIATE LINK: Precision Multi-Function AirPods & Earbuds Cleaning Pen Kit]Frequently Asked Questions
How do I know if my AirPod is charging in the case?
When you insert an AirPod into the charging case with the lid open, the status LED flashes once to acknowledge electrical contact. You can also view the battery popup widget on your iPhone, where a small black lightning bolt appears next to each charging earbud.
Can I charge one AirPod while using the other?
Yes. AirPods are engineered to operate independently. You can leave one AirPod in the case to recharge while listening to music or taking phone calls on the other bud.
Why is my right AirPod draining battery faster than the left?
AirPods designate one earbud as the primary microphone and Bluetooth bridge controller during phone calls. If you take long calls, the designated microphone earbud drains substantially faster. You can set a fixed microphone in Bluetooth settings under AirPods Microphone.
Does rubbing alcohol damage AirPods charging contacts?
Only if applied excessively. A lightly dampened cotton swab with 70% isopropyl alcohol is safe and effective for dissolving skin oils and grime. Never pour liquid directly into the case, and allow all parts to dry completely before reinserting earbuds.
The Bottom Line
Resolving an AirPod that refuses to charge usually comes down to simple physical contact. Clear out compacted pocket lint from the bottom of the charging well with a dry cotton swab, and perform the 15-second amber light case reset to recalibrate battery registers.
For more mobile battery and hardware troubleshooting advice, check out our guide on how to charge a phone without a charger or explore our complete library of cables and charging troubleshooting guides.