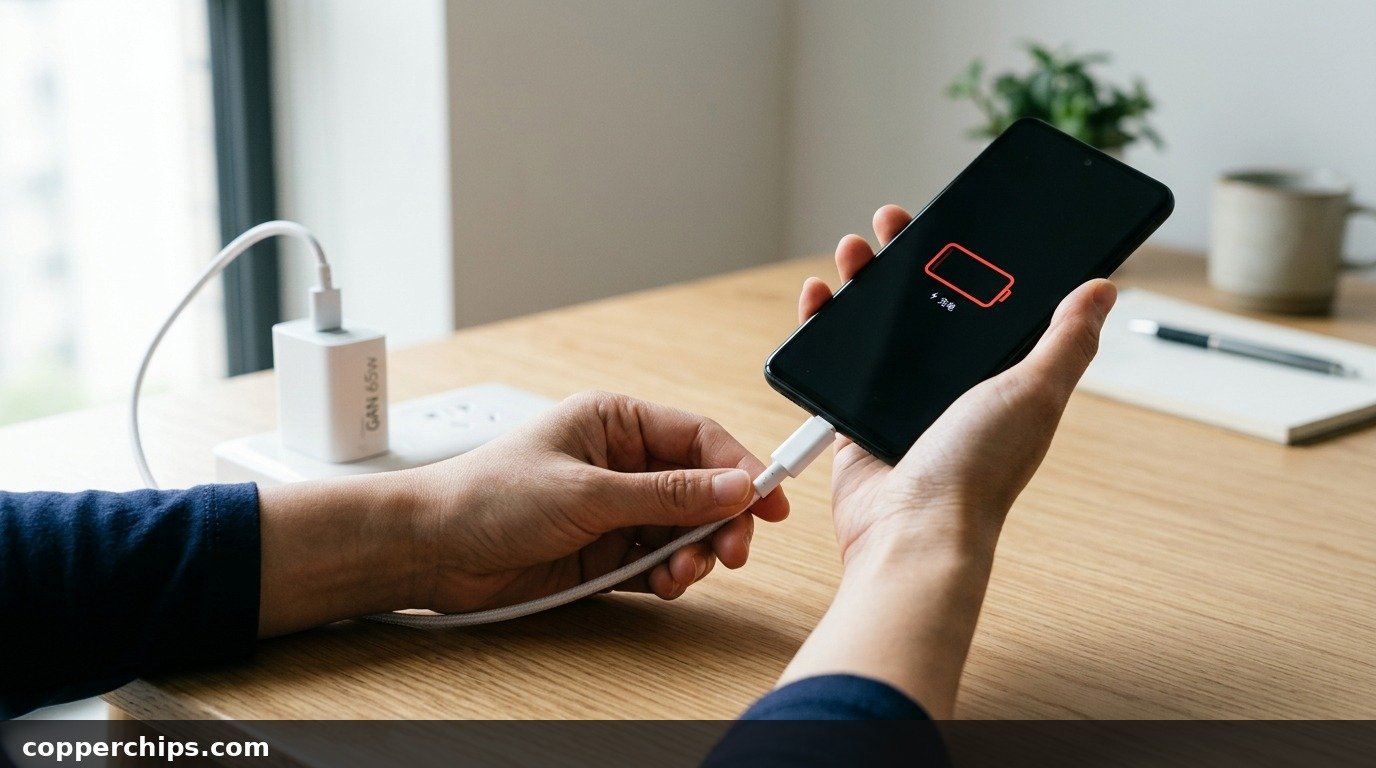
You plug your phone into the wall, set it on the nightstand, and walk away expecting a full battery. Hours later, you return to a black screen or an empty battery icon that has not budged. Wondering why is my charger not working is one of the most common tech frustrations because charging involves a multi-point hardware chain. A failure anywhere along that chain stops power flow completely.
When your charger stops working, the fault lies in one of five components: the wall outlet, the charging cable, the charging port, the power brick, or your phone battery firmware. Test the wall socket first with a lamp. Next, inspect the cable for internal wire breaks by swapping in a spare. Clean compacted pocket lint from the phone charging port using a wooden pick. If the brick produces zero charge across multiple devices, its internal transformer has failed.
- vThe 80 Percent Culprit: Damaged internal copper strands near cable strain relief collars cause most sudden charging failures.
- vPort Obstructions: Dense pocket lint prevents connector pins from seating flush against internal terminal pads.
- vProtocol Mismatches: Modern USB-C Power Delivery bricks require digital voltage handshakes that budget cables cannot negotiate.
- vSoftware Crashes: A frozen battery management service will refuse incoming voltage until you perform a hardware forced reboot.
The 5-Point Charging Chain: How Power Reaches Your Battery
Charging your device is not a single action. Power flows through five distinct stages: AC mains wall power, the transformer power brick, the USB cable conductor lines, the physical device socket, and the phone internal charge controller (PMIC). If any link breaks, charging halts.
Most people buy a brand new charger before identifying which component actually failed. You end up with extra charging blocks while your real problem was pocket lint or a tripped GFCI socket. Isolating each link one by one saves money and pinpoints the issue in under five minutes.
Follow the hardware diagnostic sequence below, moving from the wall outlet down to your phone operating system.
Fix 1: Eliminate the Wall Outlet and Power Strip
Start at the source before blaming your charging accessories. Wall outlets fail more often than homeowners realize, especially on kitchen counters, bathrooms, or circuits tied to wall light switches.
- Unplug from power strips and surge protectors: Power strip surge circuits degrade over time. Their internal thermal fuses can trip quietly while the power switch still illuminates.
- Plug the charger directly into a bare wall receptacle: Choose an outlet on an independent wall circuit.
- Verify socket power with a household lamp: Plug a working lamp or fan into the exact same socket. If the lamp stays dark, reset the room breaker or press the reset button on your GFCI outlet.
Check also whether the outlet connects to a switched wall plate. Many bedroom outlets have one half controlled by a switch near the doorway that someone flipped off by accident.
Fix 2: Inspect and Flex-Test the Charging Cable
Charging cables endure constant twisting, bending, and tension. Copper data and power strands inside the rubber jacket snap long before the outer insulation shows visible tears.
- Inspect the strain relief collars: Check the rubber junctions where the cable enters the USB-C or Lightning plug head. Look for kinks, wrinkles, or exposed silver shielding.
- Perform a gentle flex test: Plug your phone in and gently wiggle the cable collar near the phone plug. If the charging indicator flickers on and off, the internal copper conductors have fractured.
- Swap in a verified working cable: Test with a cable you know works on another household phone. Never test with a cable that has been sitting in a drawer for three years.
If swapping cables restores charging immediately, recycle the broken cable. Continuing to bend fractured wires generates localized heat that can scorch the charging port contacts.
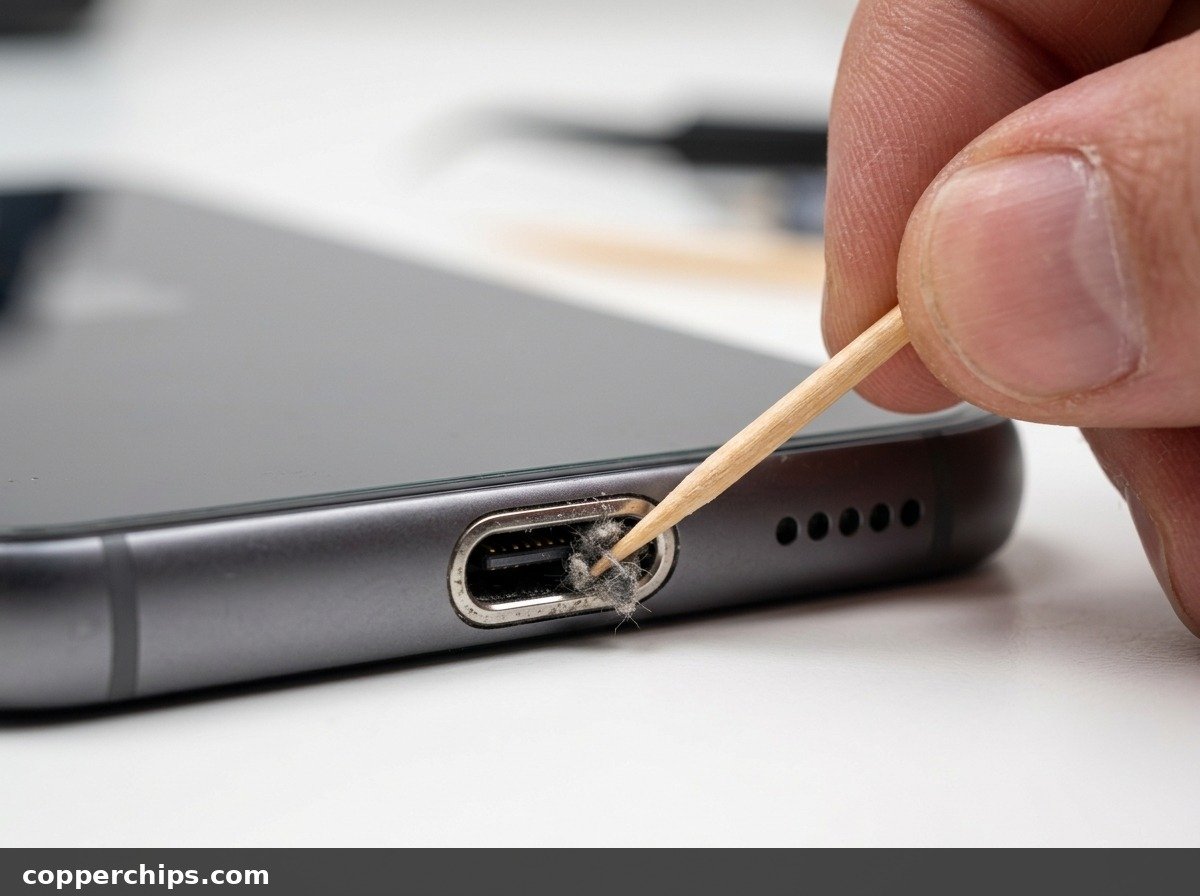
Fix 3: Remove Compacted Pocket Lint from the Charging Port
Every time you slide your smartphone into a denim pocket or purse, lint enters the open charging port. Inserting the charging plug acts like a piston, pounding that dust into a rock-hard felt pad at the bottom of the socket.
When lint builds up, the plug cannot seat deep enough for metallic pins to touch the internal terminal pads. The cable feels loose, falls out easily, or refuses to charge unless held at an angle.
- Power off your smartphone completely: Never insert tools into a live device port.
- Grab a bright flashlight: Look directly down into the port opening. You should see clean metallic base housing, not grey fuzzy buildup.
- Use a non-conductive tool: Carve a wooden toothpick down to a thin, flat wedge point. You can also use a plastic dental flosser pick.
- Scrape the bottom floor gently: Hug the back wall and floor of the port. Carefully drag compacted lint clumps outward. Avoid pressing against the delicate center tongue on USB-C ports.
Once cleared, plug the cable back in. The plug should snap into place with a crisp physical click, sitting flush against the phone chassis.
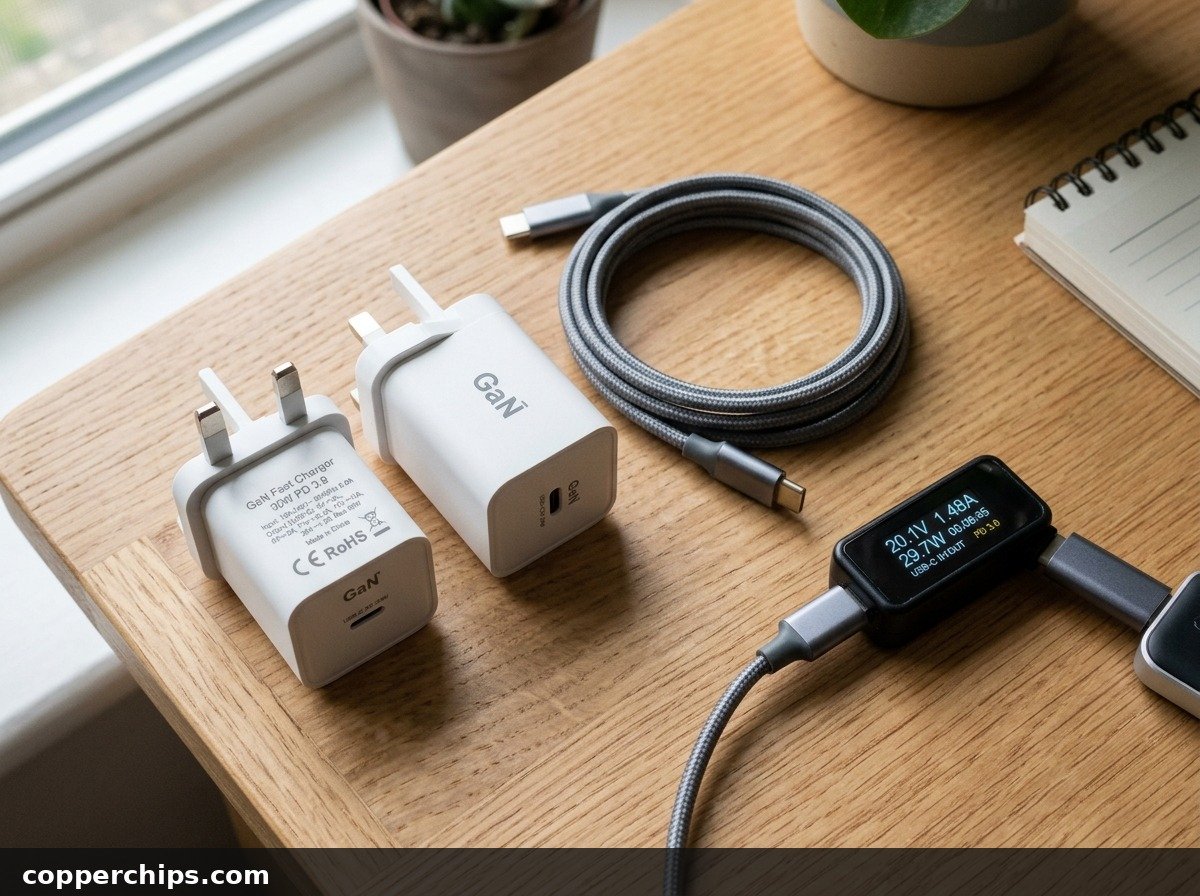
Fix 4: Verify Power Adapter Output Wattage and Protocol Handshake
Modern fast chargers are small computers. Through USB Power Delivery (USB-PD) and Programmable Power Supply (PPS), the wall adapter communicates with your phone to negotiate safe voltage levels (5V, 9V, 15V, or 20V).
Review the USB Implementers Forum USB-C charger compliance standards to understand how modern smart negotiation protects lithium batteries. If the adapter internal controller fails or cannot negotiate the protocol handshake, power delivery drops to zero.
- Check the printed wattage rating: Look at the tiny text on the prong side of your charging brick. An old 5-watt iPhone cube cannot power modern tablets or laptops that require at least 20 to 30 watts.
- Test the brick with another device: Plug a pair of earbuds, an e-reader, or a friend phone into the brick. If nothing takes a charge, the adapter internal fuse or capacitor has failed.
- Feel the adapter temperature: A functioning brick gets slightly warm during fast charging. A cold brick that delivers zero power is dead. A scorching hot brick emitting a plastic odor indicates internal shorting; unplug it immediately.
If your device shows a charging icon but the percentage keeps dropping, your adapter cannot supply enough current to offset background screen usage. Check our detailed guide on phone charging but battery going down fix to isolate power deficit causes.
Fix 5: Check for Moisture Detection Lockouts and Thermal Throttling
Modern smartphones include liquid intrusion sensors inside the charging socket. If the phone detects humidity, sweat, or liquid residue across the pins, it cuts charging power instantly to prevent electrolysis corrosion.
Both Apple and Google detail these protection states in the Apple official iPhone charging troubleshooting documentation and the Google Pixel power and charging support guide.
- Look for on-screen warnings: Alerts such as “Liquid detected in Lightning connector” or “Moisture detected in charging port” indicate an active hardware lock.
- Never charge a damp port: Unplug the cable immediately. Stand the phone upright in a dry area with gentle airflow from a fan.
- Check battery temperature: If your phone was sitting in direct sunlight or heating up during GPS navigation, the battery protection circuit shuts down charging until core temperatures fall below 35 degrees Celsius (95 degrees Fahrenheit).
For safe drying techniques that protect your internal hardware, refer to our complete walkthrough on phone charging port wet detected guide.
Fix 6: Force Restart Your Phone to Clear Frozen Battery Firmware
Your smartphone battery management system runs background software services that monitor voltage, current flow, and temperature. If this subsystem crashes, the phone stops recognizing connected charging accessories entirely.
A simple screen sleep does not clear this state. You must execute a hard hardware reboot that cuts power to the processor registers:
- iPhone (8 and newer): Press and quickly release Volume Up. Press and quickly release Volume Down. Press and hold the Side Power button until the Apple logo appears on screen.
- Samsung Galaxy: Press and hold both the Volume Down and Power (Side) buttons simultaneously for 10 seconds until the Samsung logo appears.
- Google Pixel: Press and hold the Power button for a full 30 seconds until the screen cycles black and reboots.
Once the operating system restarts fresh, connect your original charger. In many cases, the battery lightning bolt icon will illuminate immediately.
Fix 7: Inspect for Pin Corrosion or Physical Port Looseness
Repeated drops while plugged in can damage the internal solder joints anchoring the charging port to the motherboard. Examine the physical port closely under a bright light.
- Check for green or black residue: Green corrosion indicates copper oxidation from moisture exposure. This residue acts as an electrical insulator, blocking power delivery.
- Check for pin wobble: Insert a clean cable. Gently move the plug up and down with fingertip pressure. If the entire internal socket moves loosely inside the phone frame, the daughterboard mounting has broken.
Clean light pin oxidation using a drop of 99 percent isopropyl alcohol on an ultra-fine precision swab while the phone is powered off. Allow 15 minutes for complete evaporation before plugging into power. If the port physically wiggles, a repair shop must solder a replacement port assembly.
Still Not Working? Try This
If you have tested multiple cables, swapped power bricks, cleared port lint, and verified the wall outlet without success, use these deeper diagnostic checks:
- Test wireless charging (Qi / MagSafe): If your phone supports wireless induction charging, place it on a Qi pad. If the phone charges wirelessly but refuses wired cables, the problem is 100 percent confirmed to be a damaged charging port or burnt VBUS pin, not a dead battery.
- Use an inline USB digital power meter: A cheap USB power tester plugs between your brick and cable, displaying live voltage and amperage numbers. If the tester reads 5.0V but 0.00A when connected, the phone charge controller is refusing current.
- Recover from deep battery discharge: If your phone has sat completely dead for weeks, the battery cell voltage may have dropped below the minimum boot threshold (around 2.8 volts). Plug it into a slow 5W or 10W charger and leave it undisturbed for a full 60 minutes. Fast chargers often refuse to engage deeply depleted cells.
If you are stranded without access to working accessories, explore alternate power sources in our guide on how to charge phone without charger. For broader hardware connection and cable diagnostics, visit our Cables and Chargers troubleshooting category hub.
Frequently Asked Questions
Why is my charger working on one phone but not another?
Different phones require different charging protocols and wattages. A high-power laptop or tablet charger might negotiate USB Power Delivery successfully with a modern smartphone, but fail on an older phone that only accepts legacy USB BC 1.2 signaling. In other cases, the non-working phone simply has compacted lint in its port.
How do I know if the problem is my cable or my charging brick?
Use the substitution method. Keep the brick plugged in and swap to a known-working cable. If the phone charges, the original cable is broken. If it still does not charge, keep the new cable and swap the brick to a different wall adapter. Whichever component swap restores charging is your failed hardware.
Can pocket lint in my charging port cause permanent damage?
Pocket lint alone does not short-circuit pins because cotton and fabric fibers are non-conductive. However, forcing a charging cable hard against dense lint can bend the delicate center pin array on USB-C ports. Trapped lint also absorbs ambient humidity, accelerating pin corrosion.
Is it dangerous to keep using a charger that only works at an angle?
Yes. When a charger only works at a specific angle, you are making and breaking electrical contact across fractured copper strands. This micro-arcing generates heat inside the connector head that can melt the plastic plug casing or scorch the gold contact pins inside your phone socket.
Why does my phone say charging slowly even with a fast charger?
Slow charging happens when your phone and brick fail to negotiate a fast-charge protocol (such as USB-PD or Quick Charge). This occurs if you use a cheap charging cable lacking high-amperage data lines, if the port contacts are partially dirty, or if the phone restricts charging speeds due to high internal temperature.
The Bottom Line
A charger that suddenly stops working rarely requires buying an expensive new phone. In the vast majority of cases, the failure traces back to fractured copper wires inside a worn cable, a tripped power strip, or dense pocket lint preventing the plug from seating flush. Work systematically through the charging chain from the wall receptacle to your device port before spending money on replacements. Cleaning the port gently with a wooden pick and swapping to a certified braided cable resolves the issue almost every time.