


Single sign-on (SSO) is a session and user authentication service that permits a user to use one set of login credentials for example, a username and password to access multiple applications within the same ecosystem.
SSO capability is delivered through support for the SAML2.0 authentication protocol. SAML provides a single authentication endpoint and allows users to log in once and then be granted access to any number of applications. Single Sign-On (SSO) enables users to use one set of credentials to log in to multiple websites and applications.
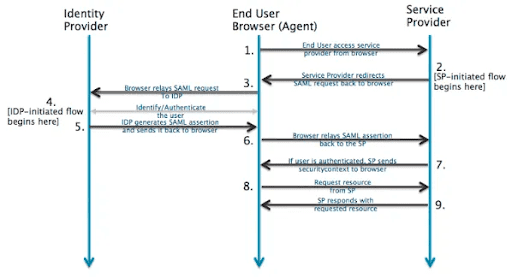
How It Works
SAML SSO implementation with Azure Active Directory (Identity Provider) works wherein a user attempts to access a service provider’s application and authenticate the user with their role by AAD with a SAML request. The user provides valid credentials so that AAD creates an assertion. AAD will then validate the credentials and assertion is provided back to the application to authenticate and allow users to access the application. SSO – Single Sign-On. SSO allows a user to use one set of credentials to log in to multiple websites and applications.
Configuring SAML SSO
Setting up SAML SSO with Azure Active Directory requires some configuration on the Azure AD side to register and recognize the SSO service provider application and on the application side to configure Active Directory as the identity provider for the account.
A. Register a Service Provider in Azure Portal for SSO
Azure account to be created as an administrator who would have all the registered applications on Azure Portal permission to start enabling the SSO in the active directory.
We need to register our service provider application in Azure Active Directory and get the SAML metadata URL. Assuming we already have an Azure account, the first step is to login into the web console and use the top-left menu to select the Azure Active Directory service page.
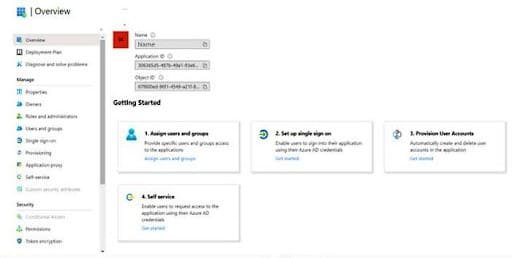
Next, we’ll click on Enterprise Application, which brings us to the list of existing applications, followed by clicking on “New Application -> Create your own application”, which asks you to enter “What’s your application name”, you need to enter the name of your application and then asks you “What are you looking to do with your application?”, you need to select the last option i.e. Integrate any other application you don’t find in the gallery (Non-gallery) and then click on ‘Create’ which shows to below screen:
Meta-data file can be downloaded from below URL:
https://<<app-url>>/saml/metadata
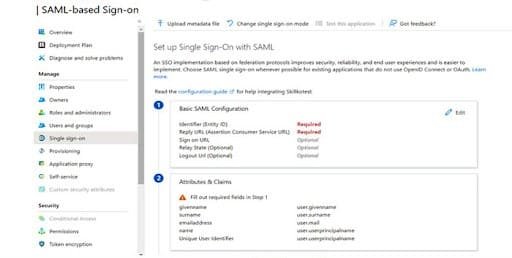
Once meta-data file is uploaded on Azure portal, then Azure portal admin needs to fill the form on service provider’s page to provide idP related information as mentioned in below screenshot:
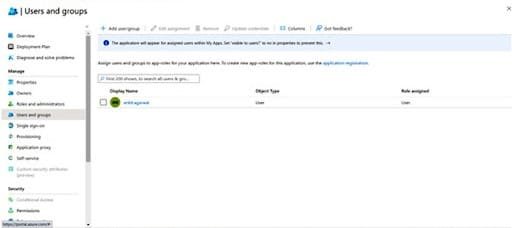
Add Users to access the application by navigating to the ‘Users and groups’ section.
B. Configure your Identity Provider
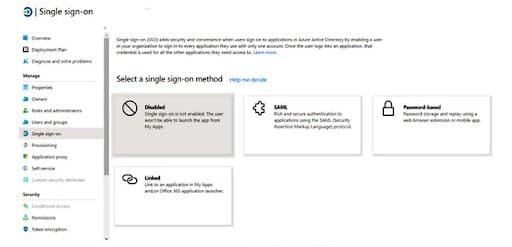
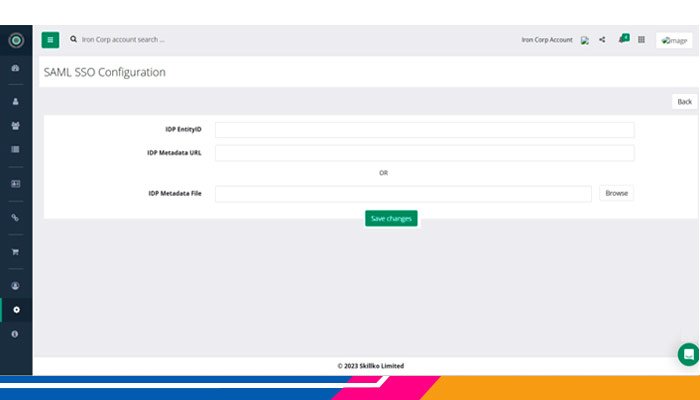
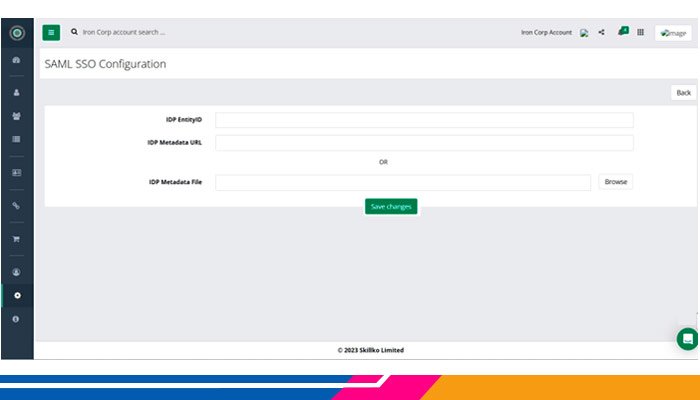
In the application, an account administrator needs to select SAML SSO under the Account Settings menu.
The account administrator needs to provide the below information along with a metadata file to enable SAML SSO for them against their Azure Active Directory application that was registered for SSO.
Logging in via SAML SSO
Once SAML SSO is activated in the Application account, end users will be able to select the “Login with SAML SSO” option on the login page. Once the user clicks on “Login with SAML SSO”, the application will ask for an email ID and the user needs to enter it.

Afterwards, when the user clicks on the Login button, an authentication request will go to the identity provider (Azure AD) with a SAML request.
The identity provider will authenticate the SAML request, if it gets authenticated successfully, the user will land into the service provider’s application.
If not authenticated successfully, then the user will be redirected to authenticate with their password on the identity provider portal page. On successful authentication the user will be redirected to the website and be logged in.